
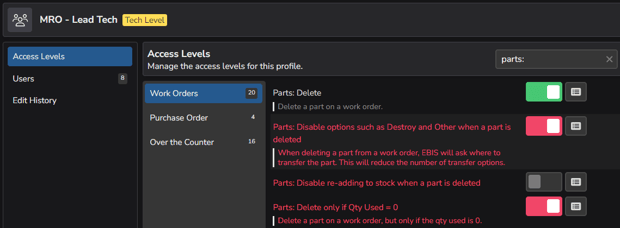
The following User Profile Settings (Config > User Profiles > select user profile > Access Levels > Work Orders) should be configured for any profile that will need to handle part adjustments:
- Required Settings:
- Parts: Delete (Enabled)
- Parts: Disable re-adding to stock when a part is deleted (Disabled)
- Optional Settings:
- Parts: Disable options such as Destroy and Other when a part is deleted
- Parts: Delete only if Qty Used = 0
1. From the Work Order Module, find the W/O that contains the part that should be returned to stock.

2. Double click on the W/O to open.

3. Click on List Parts.

4. Double-click the row that contains the part that should be returned to stock.
Note: Avoid clicking the underlined fields on the parts list - these are hyperlinks that will take you to a different screen.

5. On the Edit Part Screen, click the Trash Icon in the top right to delete part/return to stock.

6. Enter the quantity of the part to remove/return to stock and, if a reason is required, select a reason from the drop-down.

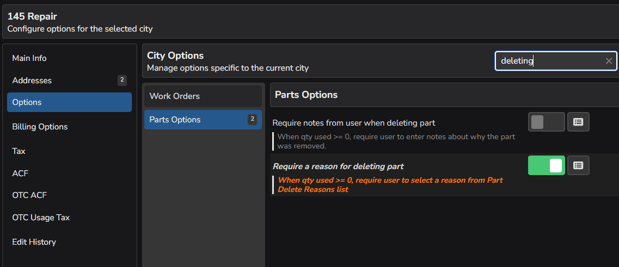
City Configuration Settings (Config > Cities > select city > Options > Parts Options (under Work Orders)) for deleting parts:
- Optional Settings:
- Require notes from user when deleting part
- Require a reason for deleting part (Enabling this option is Recommended)
7. In the Transfer To dropdown, choose 'Re-add to Inventory' to return the part to stock.

8. Choose a Stock Room to transfer to, a Location for the part (optional), and add any Notes (optional).

9. Click Delete to return the item to stock.
