Log Book Labels
Understanding the options and configuration when generating a log book label
Log book labels can be created from work orders that are linked to an aircraft.
To create a log book, from the work order, go to the Log Books sidebar.
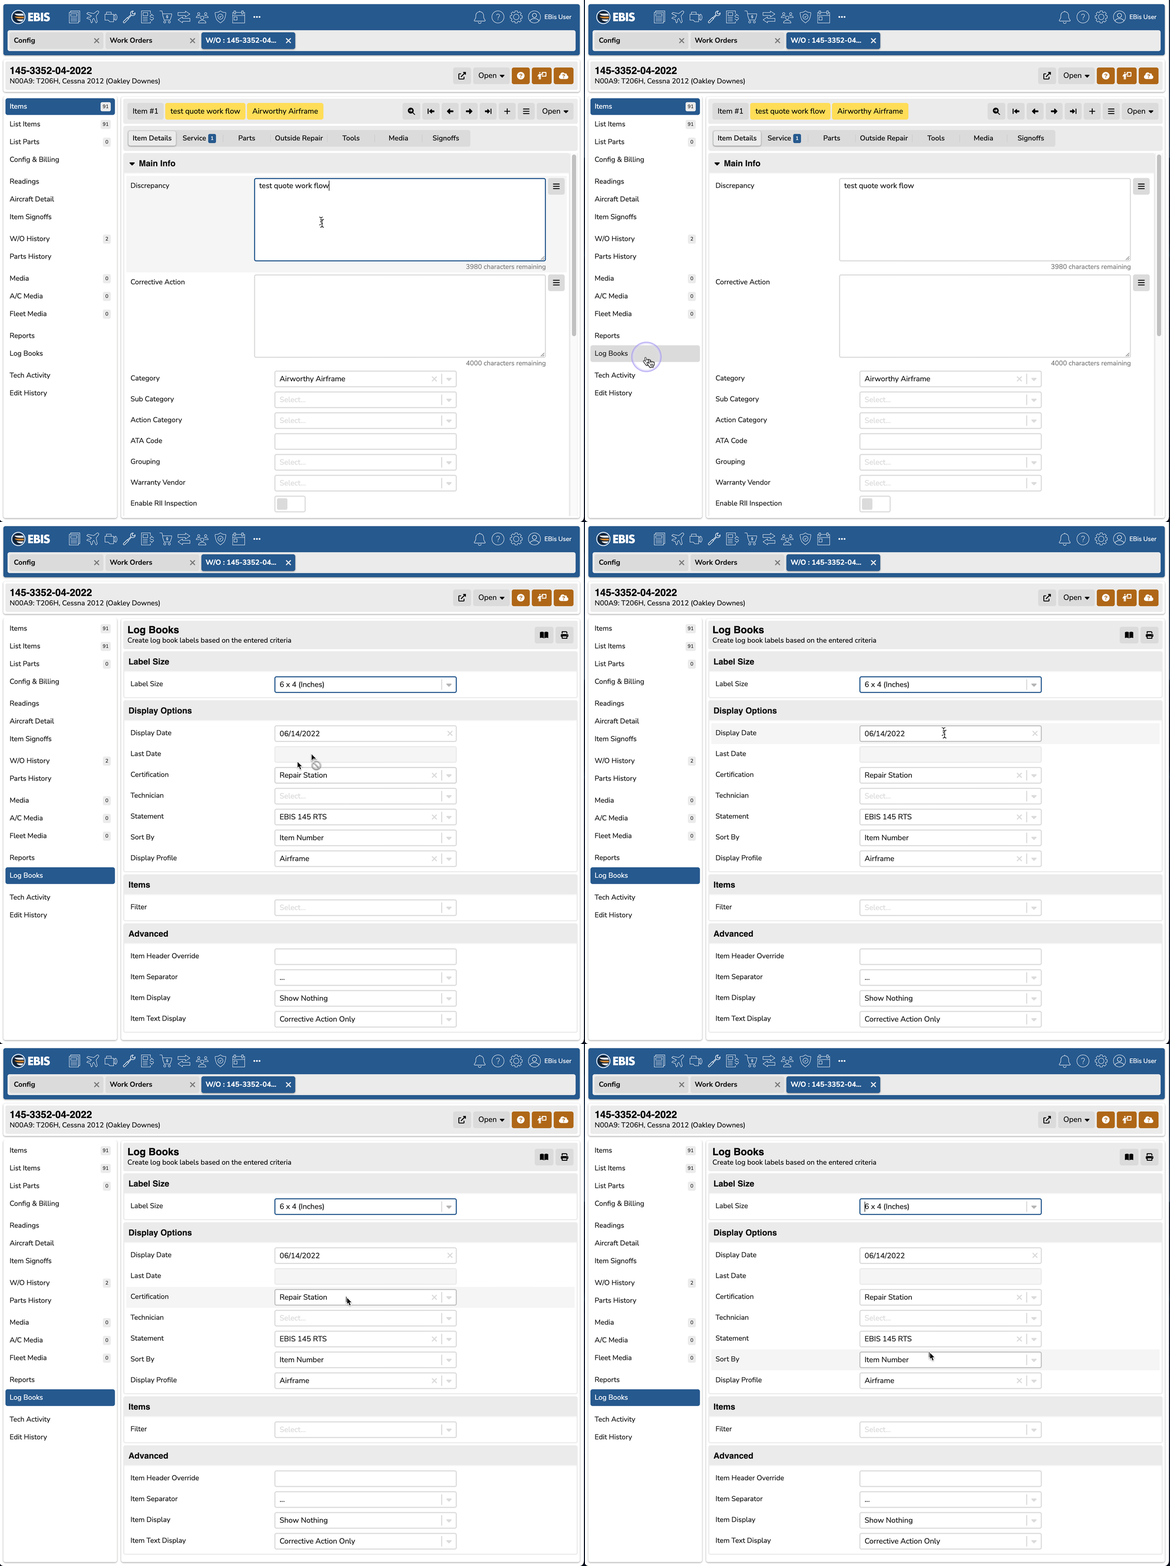
From here, select various options such as the label size, display date, certification (if you are a repair station, this is the city certification info), and more. Once selected, you can generate the data to copy into another application using the "Log Book Helper" icon, or generate a PDF using the printer icon.

Note that if you are in a repair order, that is tied to a specific part component, you can generate an 8130, EASA Form 1, or CASA (for Australia). These options are set in the Config > Cities > (select a city) > Options sidebar > Work Orders > Repair Order section.
Certifications for a Repair Station
If your EBIS license includes a city certification, you can display your city certification information on the log book labels. Certification selection is optional on the log books, but is most likely required by your governing agency (FAA, EASA, etc.) if you have been approved for specific certificates.
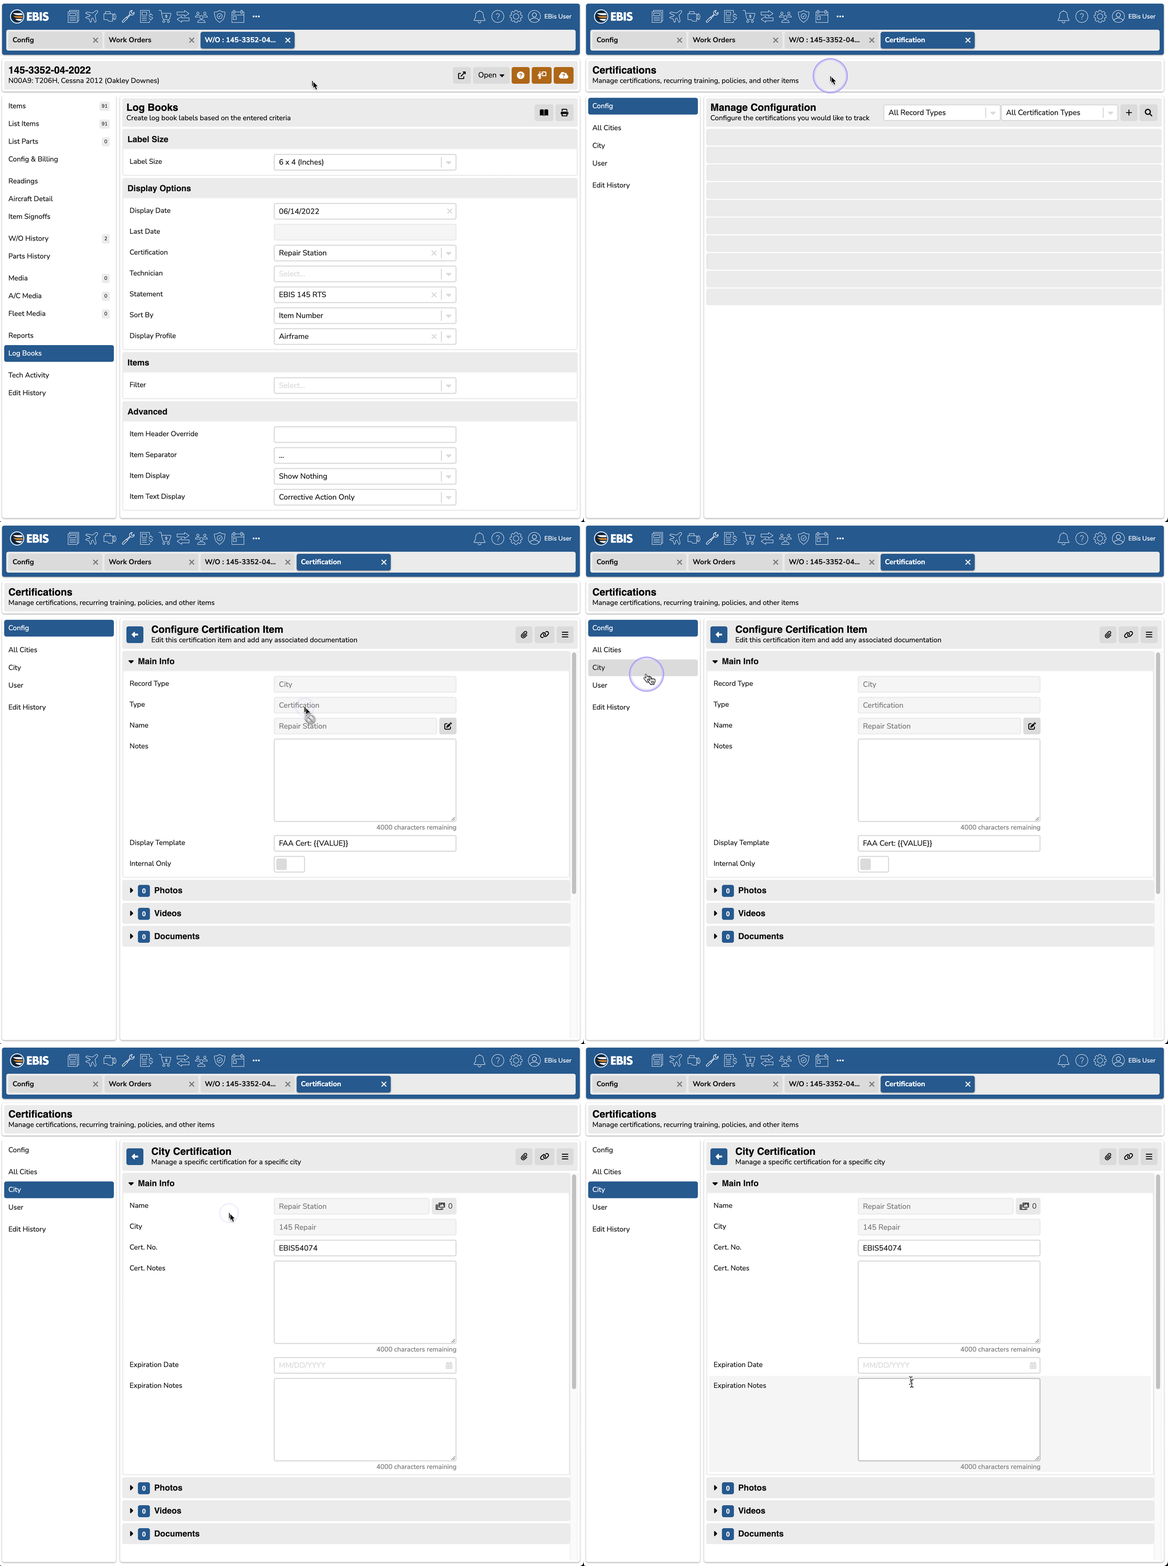
Certifications are set up from the More menu > Certifications. If you do not have this option, check your User Profile > Certification access levels.
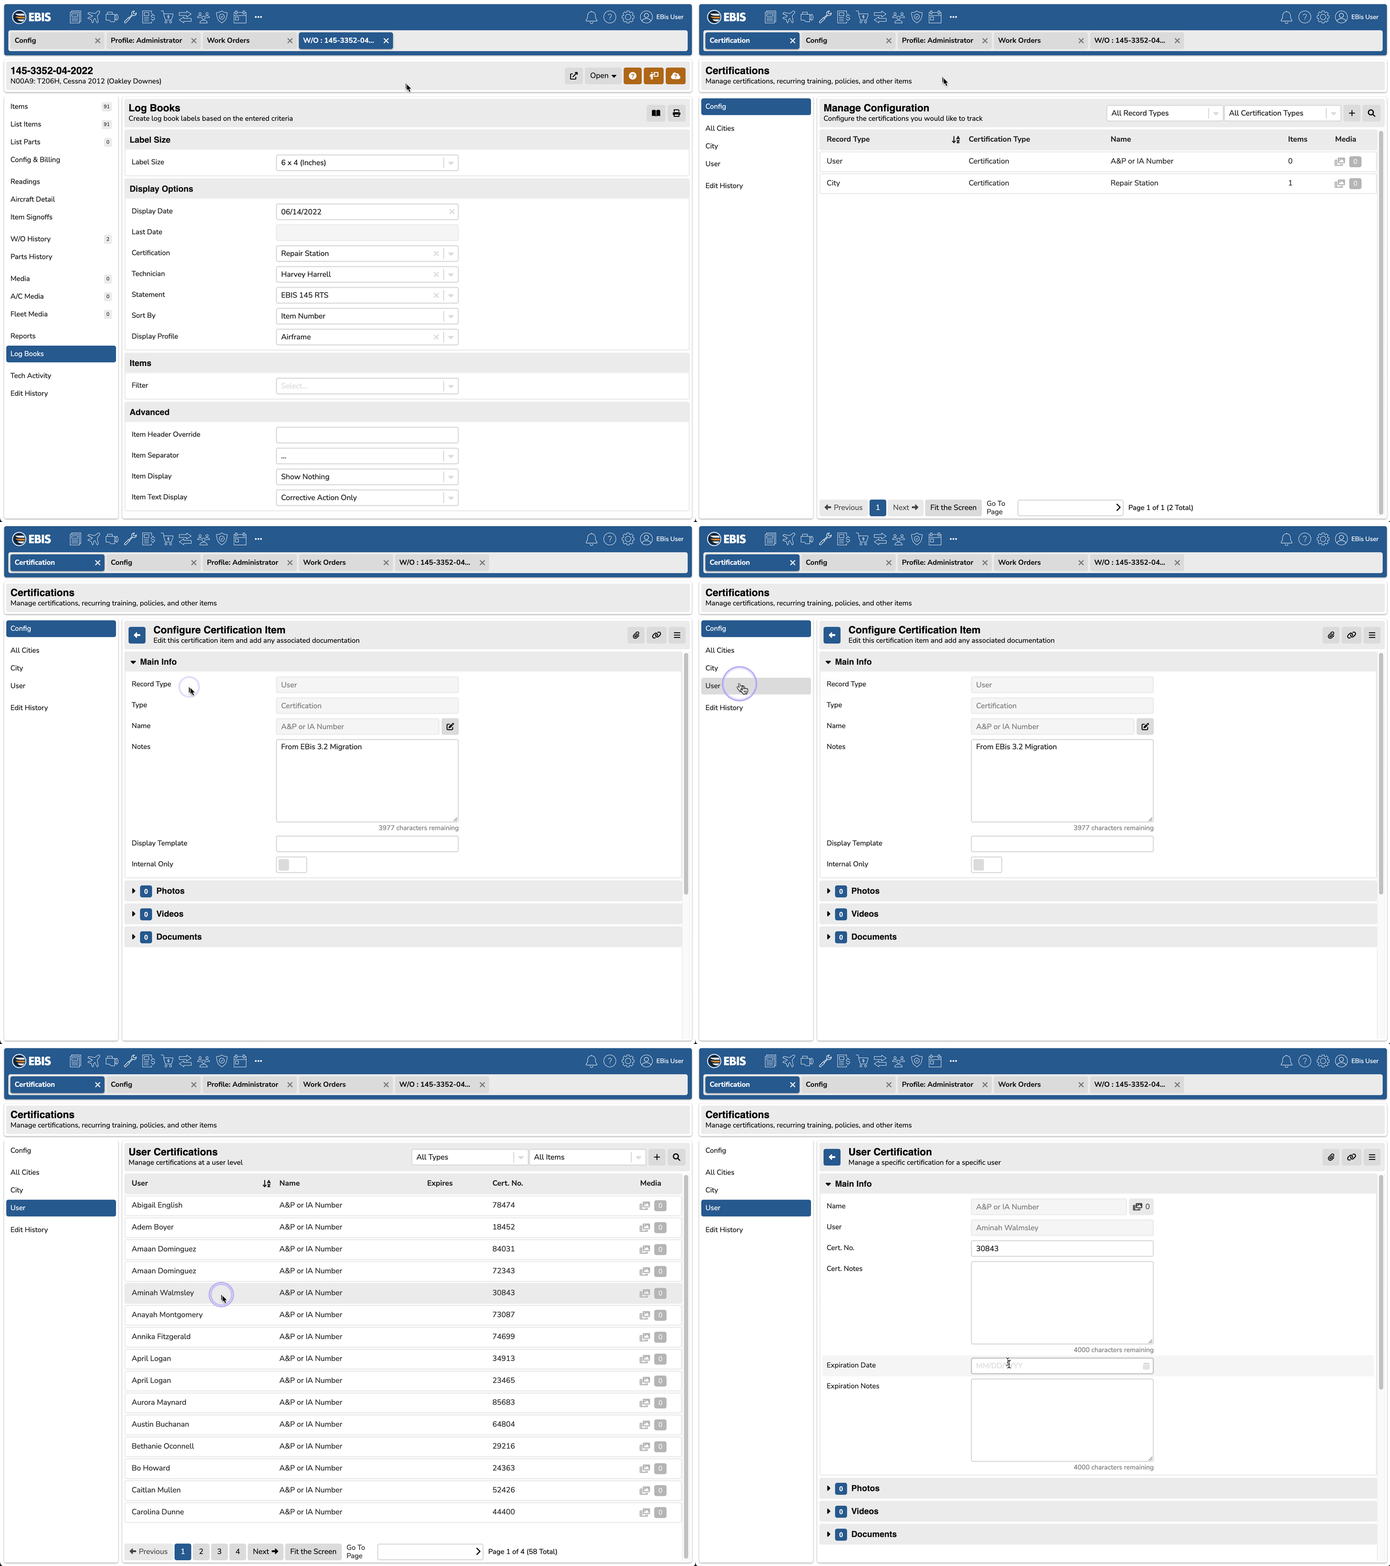
Certifications must first be set in the Config sidebar - add a City | Certification and give it a name such "Repair Station" or "Certificate Info".
Once the configuration exists, in the Certifications tab, go to the City sidebar and add your city to the certification you've added and fill out the Cert No. - this will appear on the log books if selected.
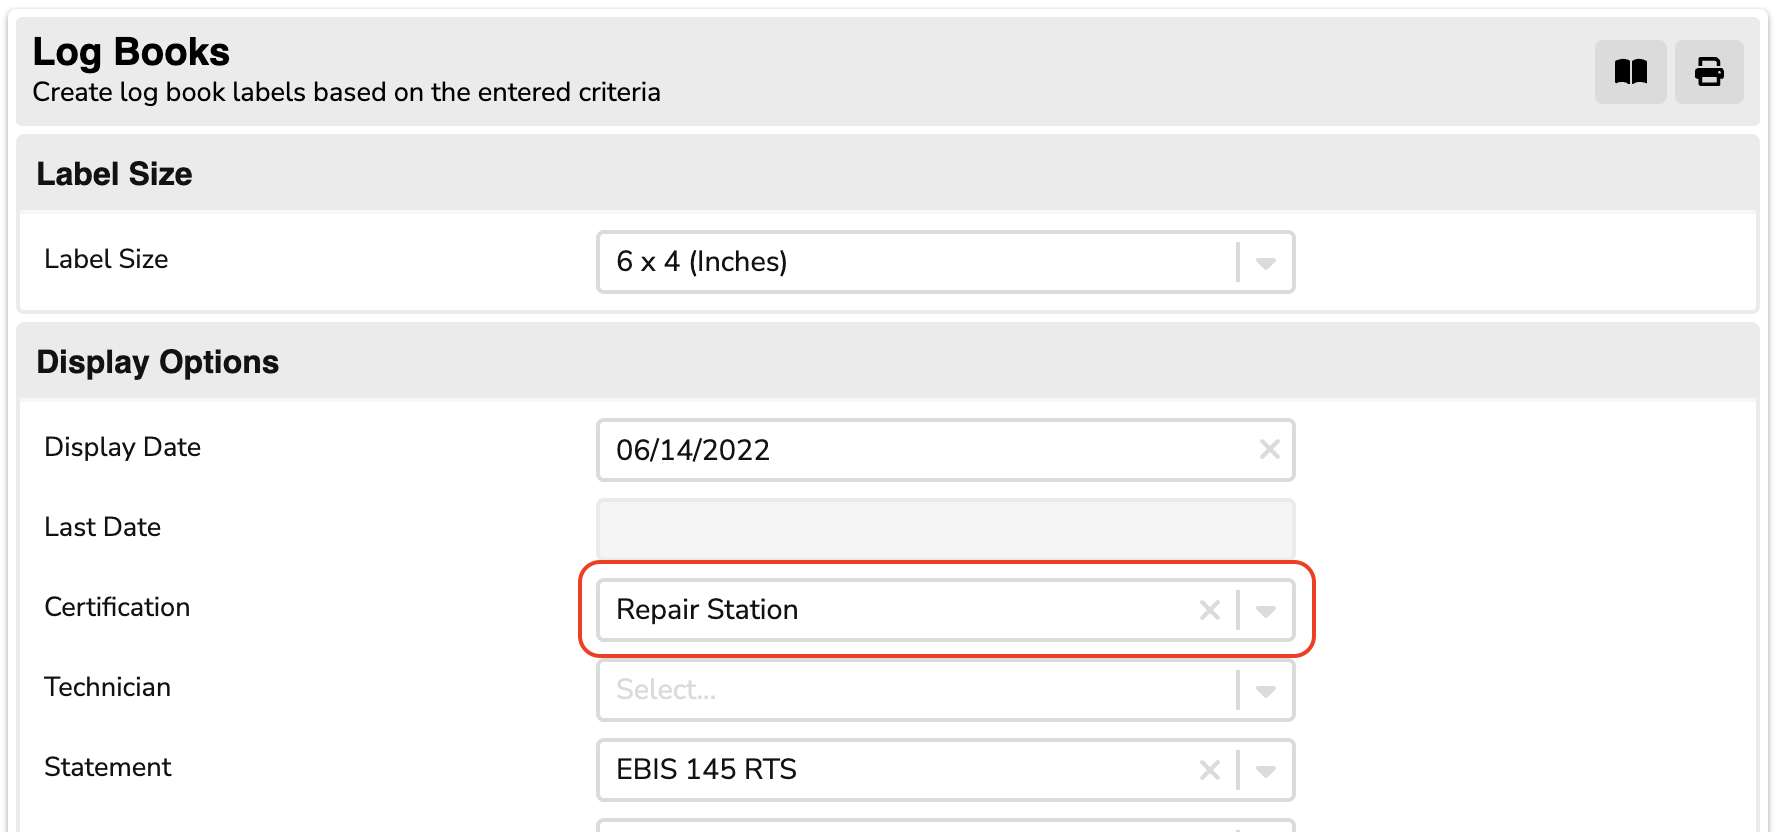
Once the certification info is created for the city, in the W/O > Log Book, select the certification and the technician that is signing off the work order.
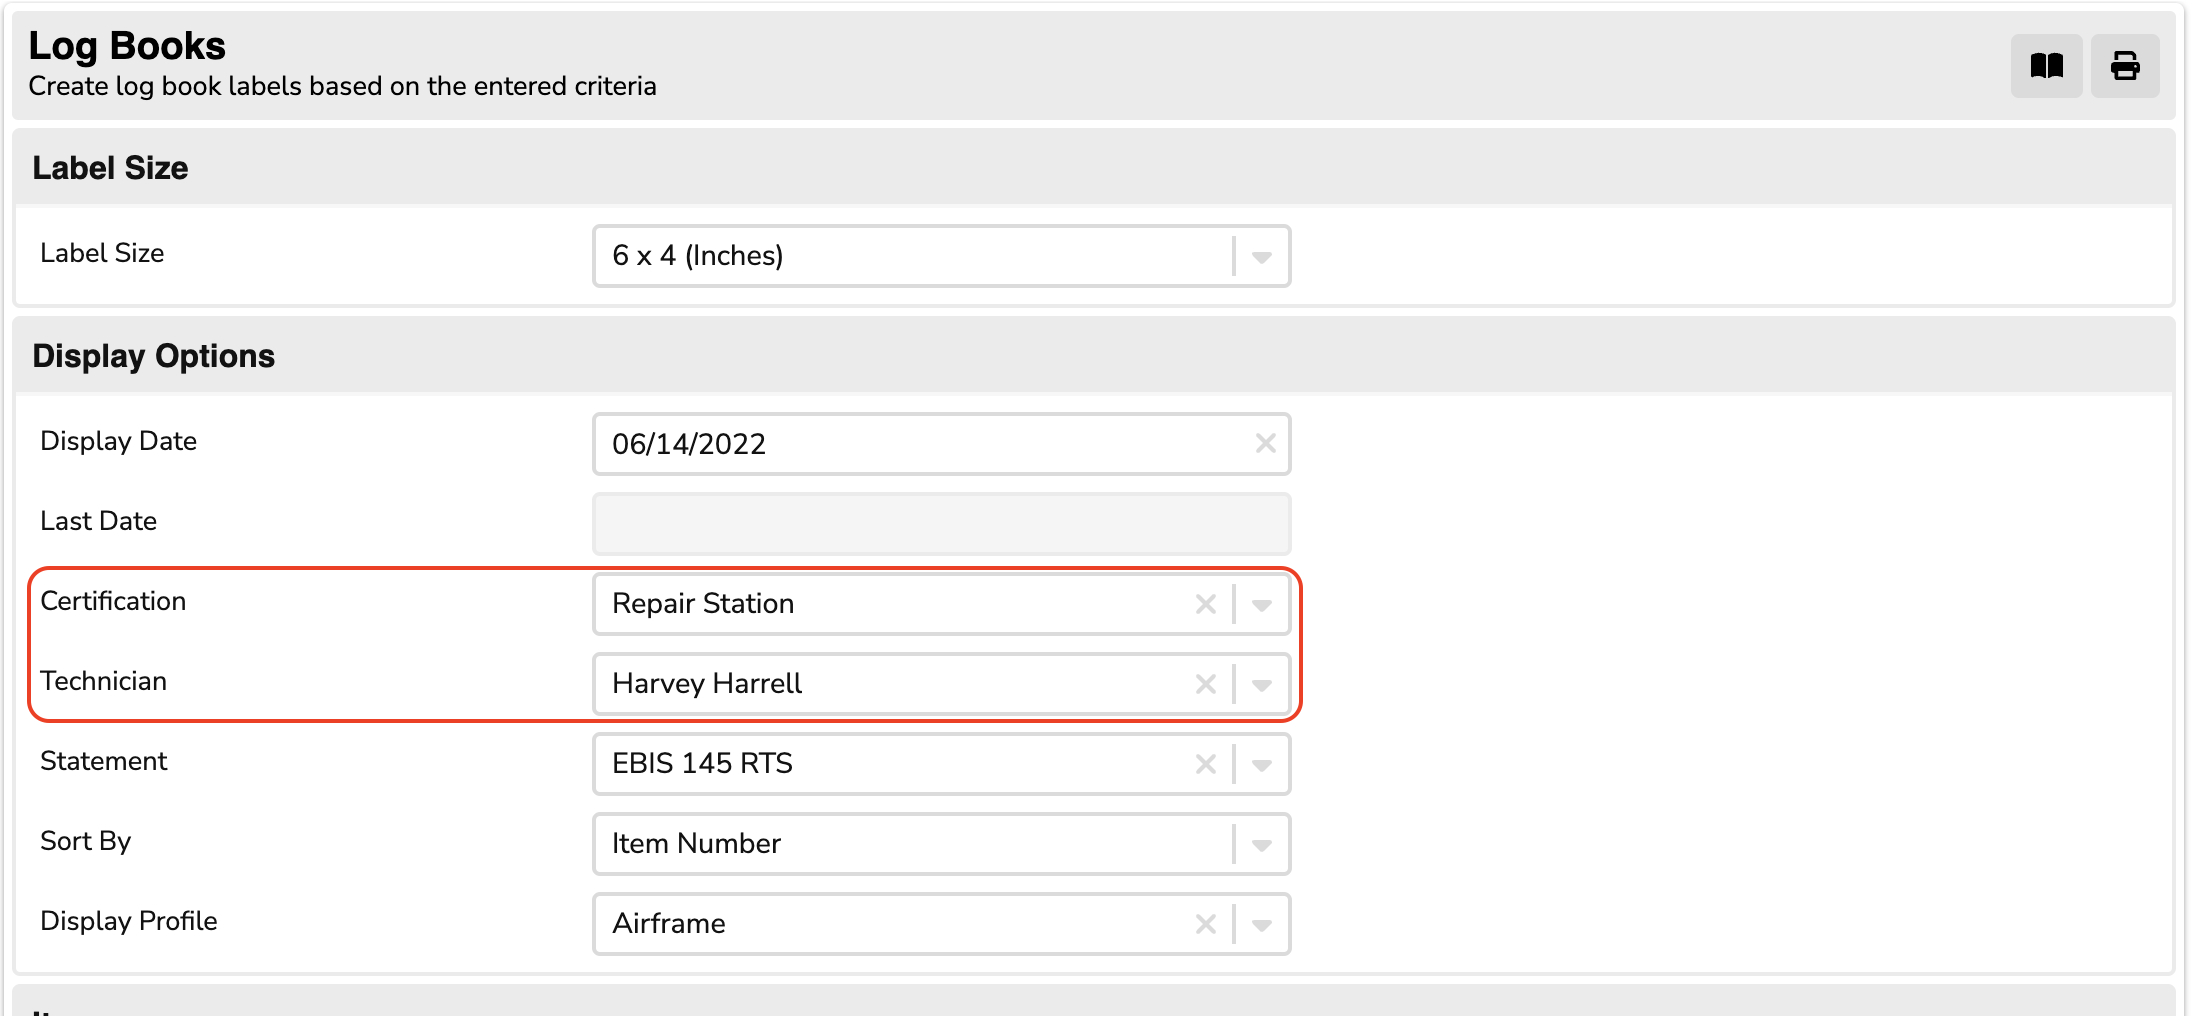
Showing A&P / Technician Specific Certifications
If you are not a repair station, you can select a technician specific certification, such as a technician's A&P number, by selecting a certification that is linked to the user.
User based certifications are set from the More... > Certifications screen. From the Config sidebar, first add a User certification that is for an A&P or IA number, and then add the specific user and their info, such as the A&P number.
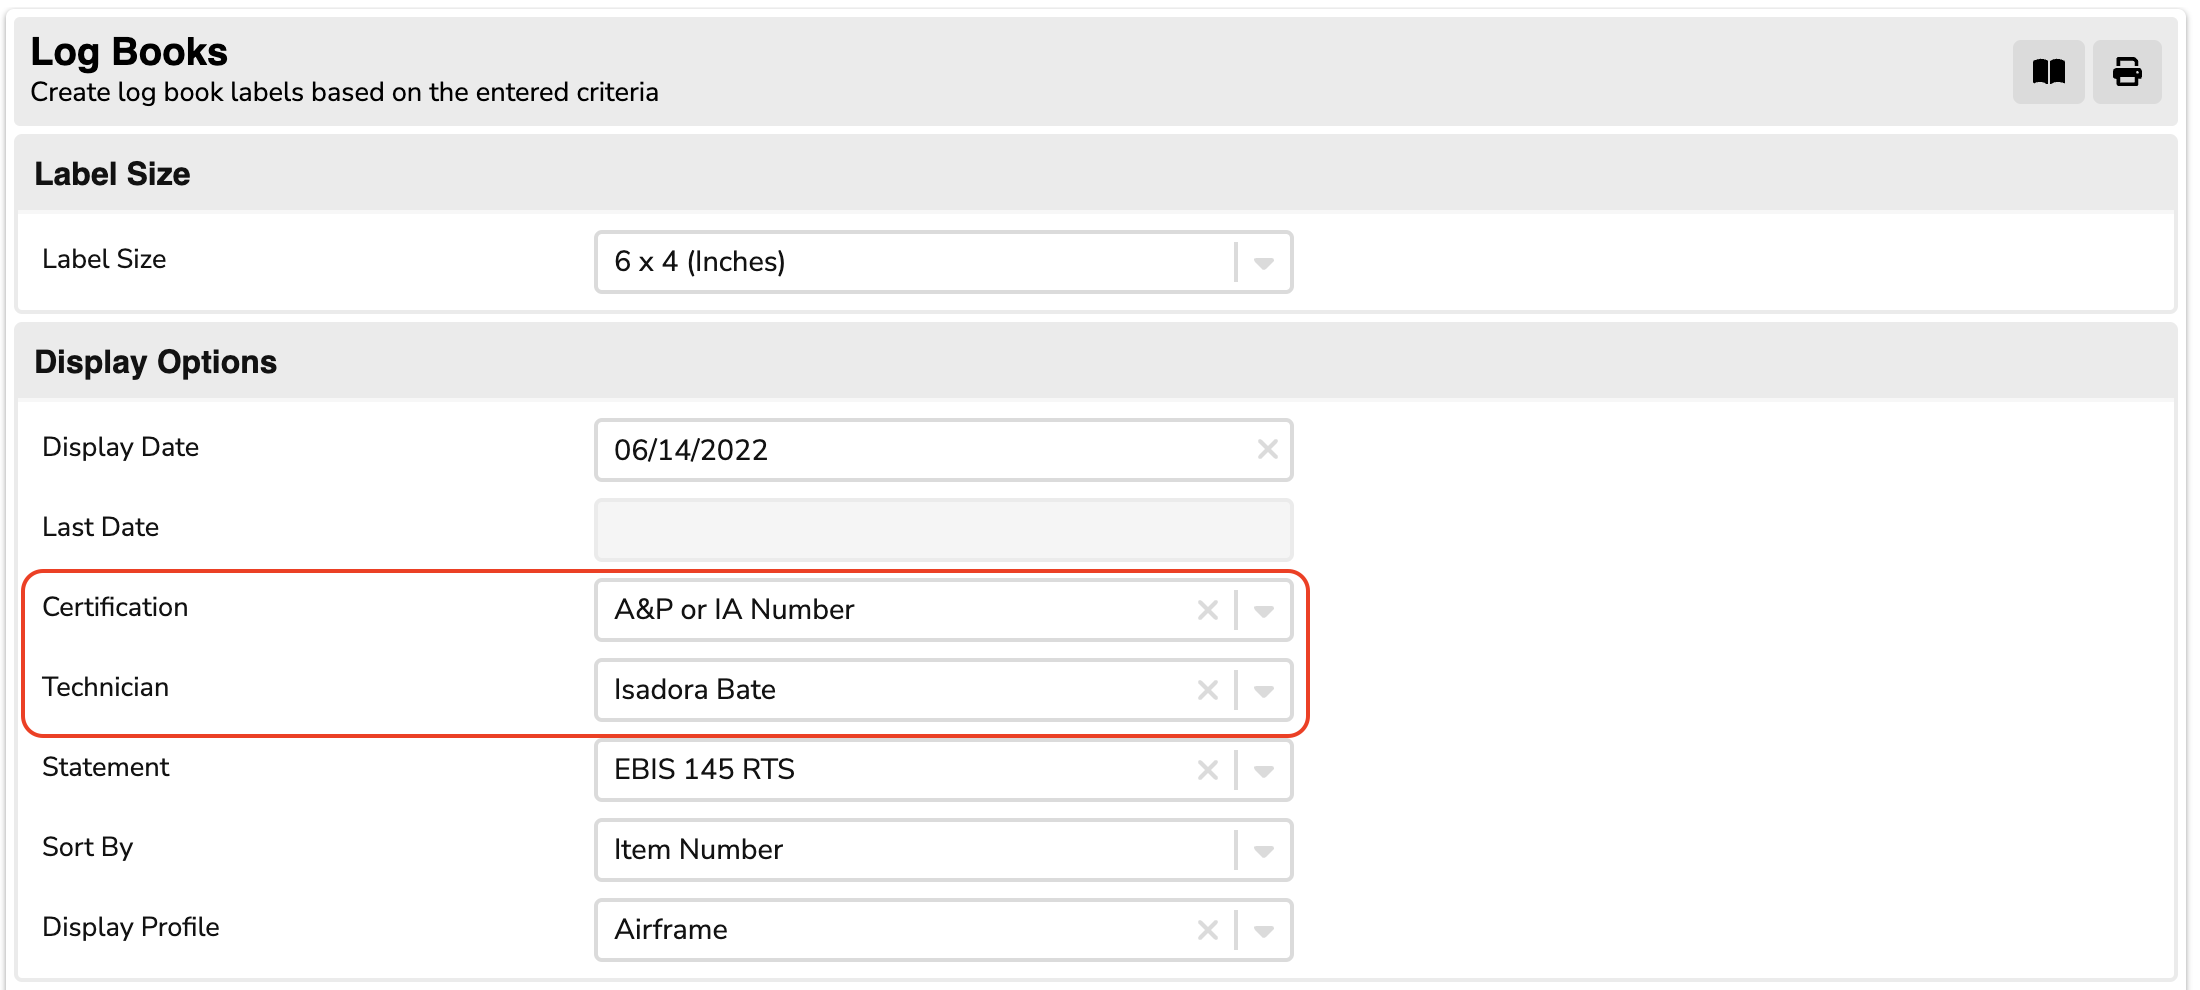
Once set, in the W/O > Log Book, select the A&P or IA Number and select the technician name.
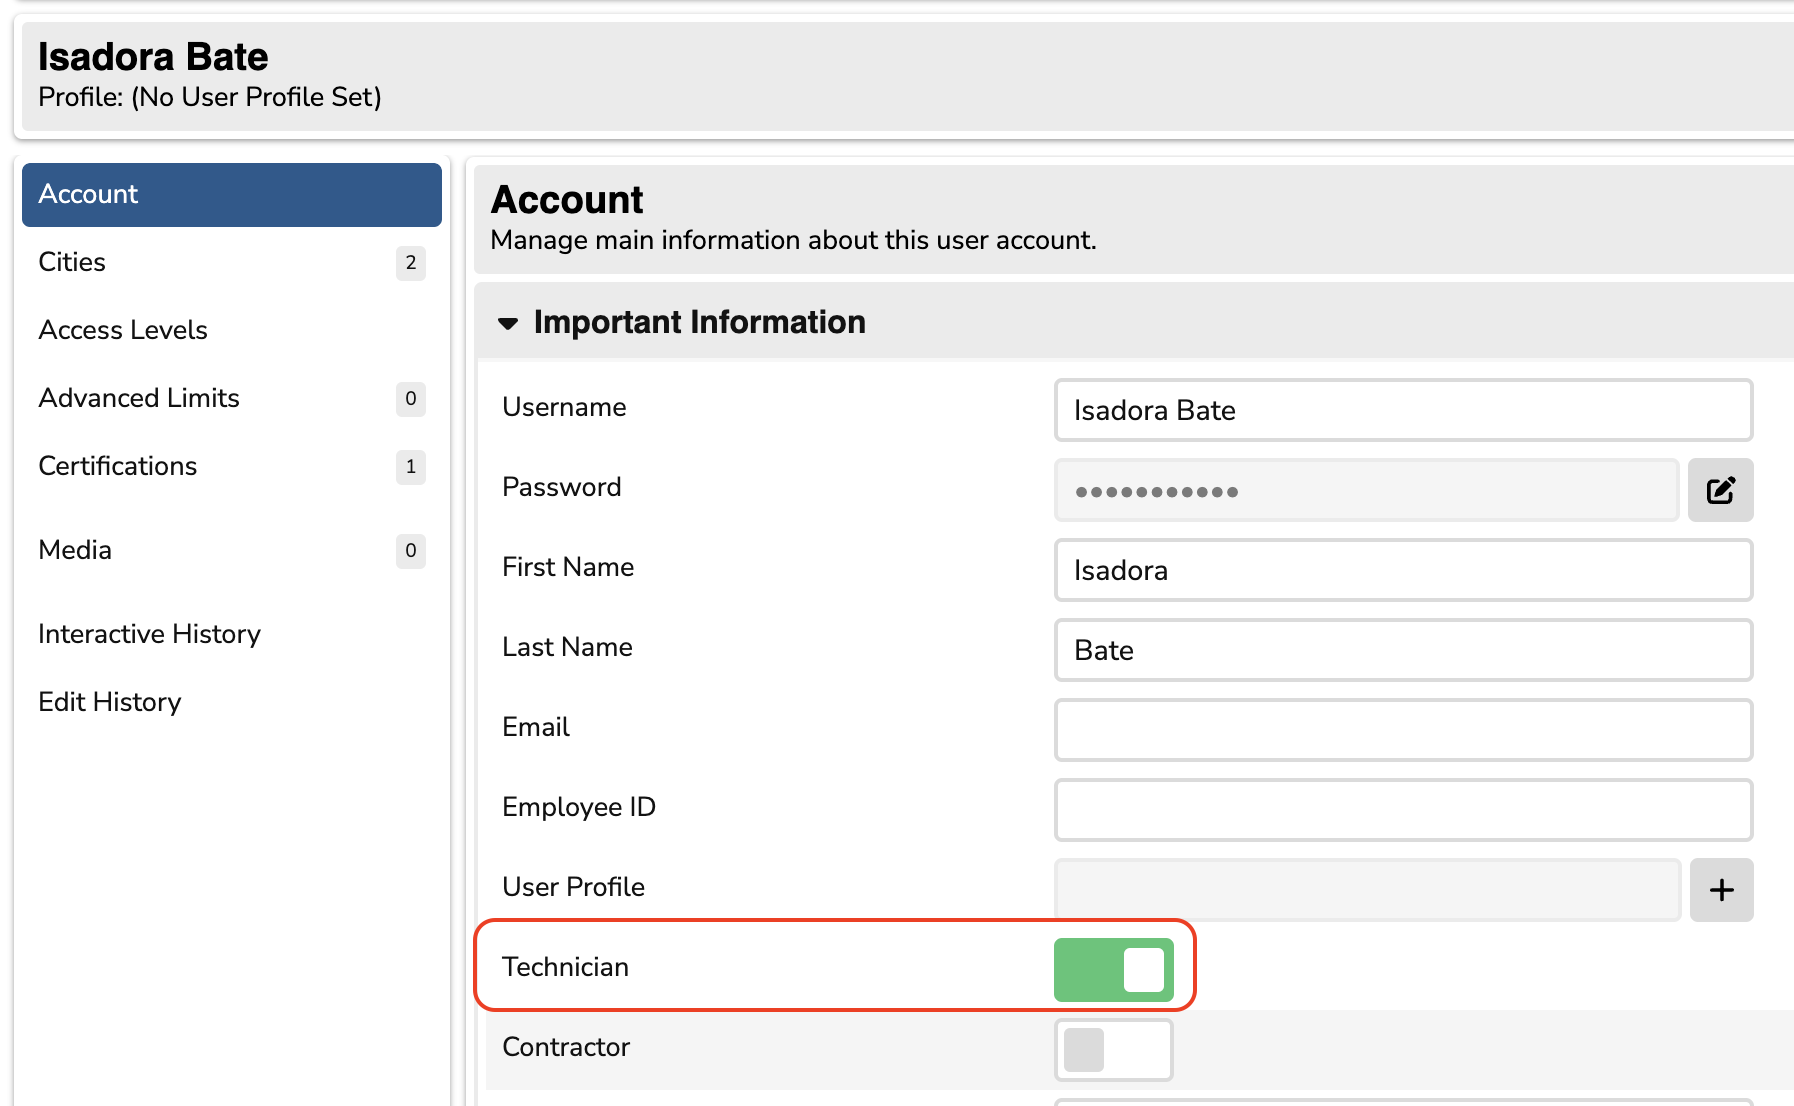
Users must be set as a technician to appear on this list: this is set in each user's account from Config > Users. Users must also have access to the city where the work order is set.
Statements
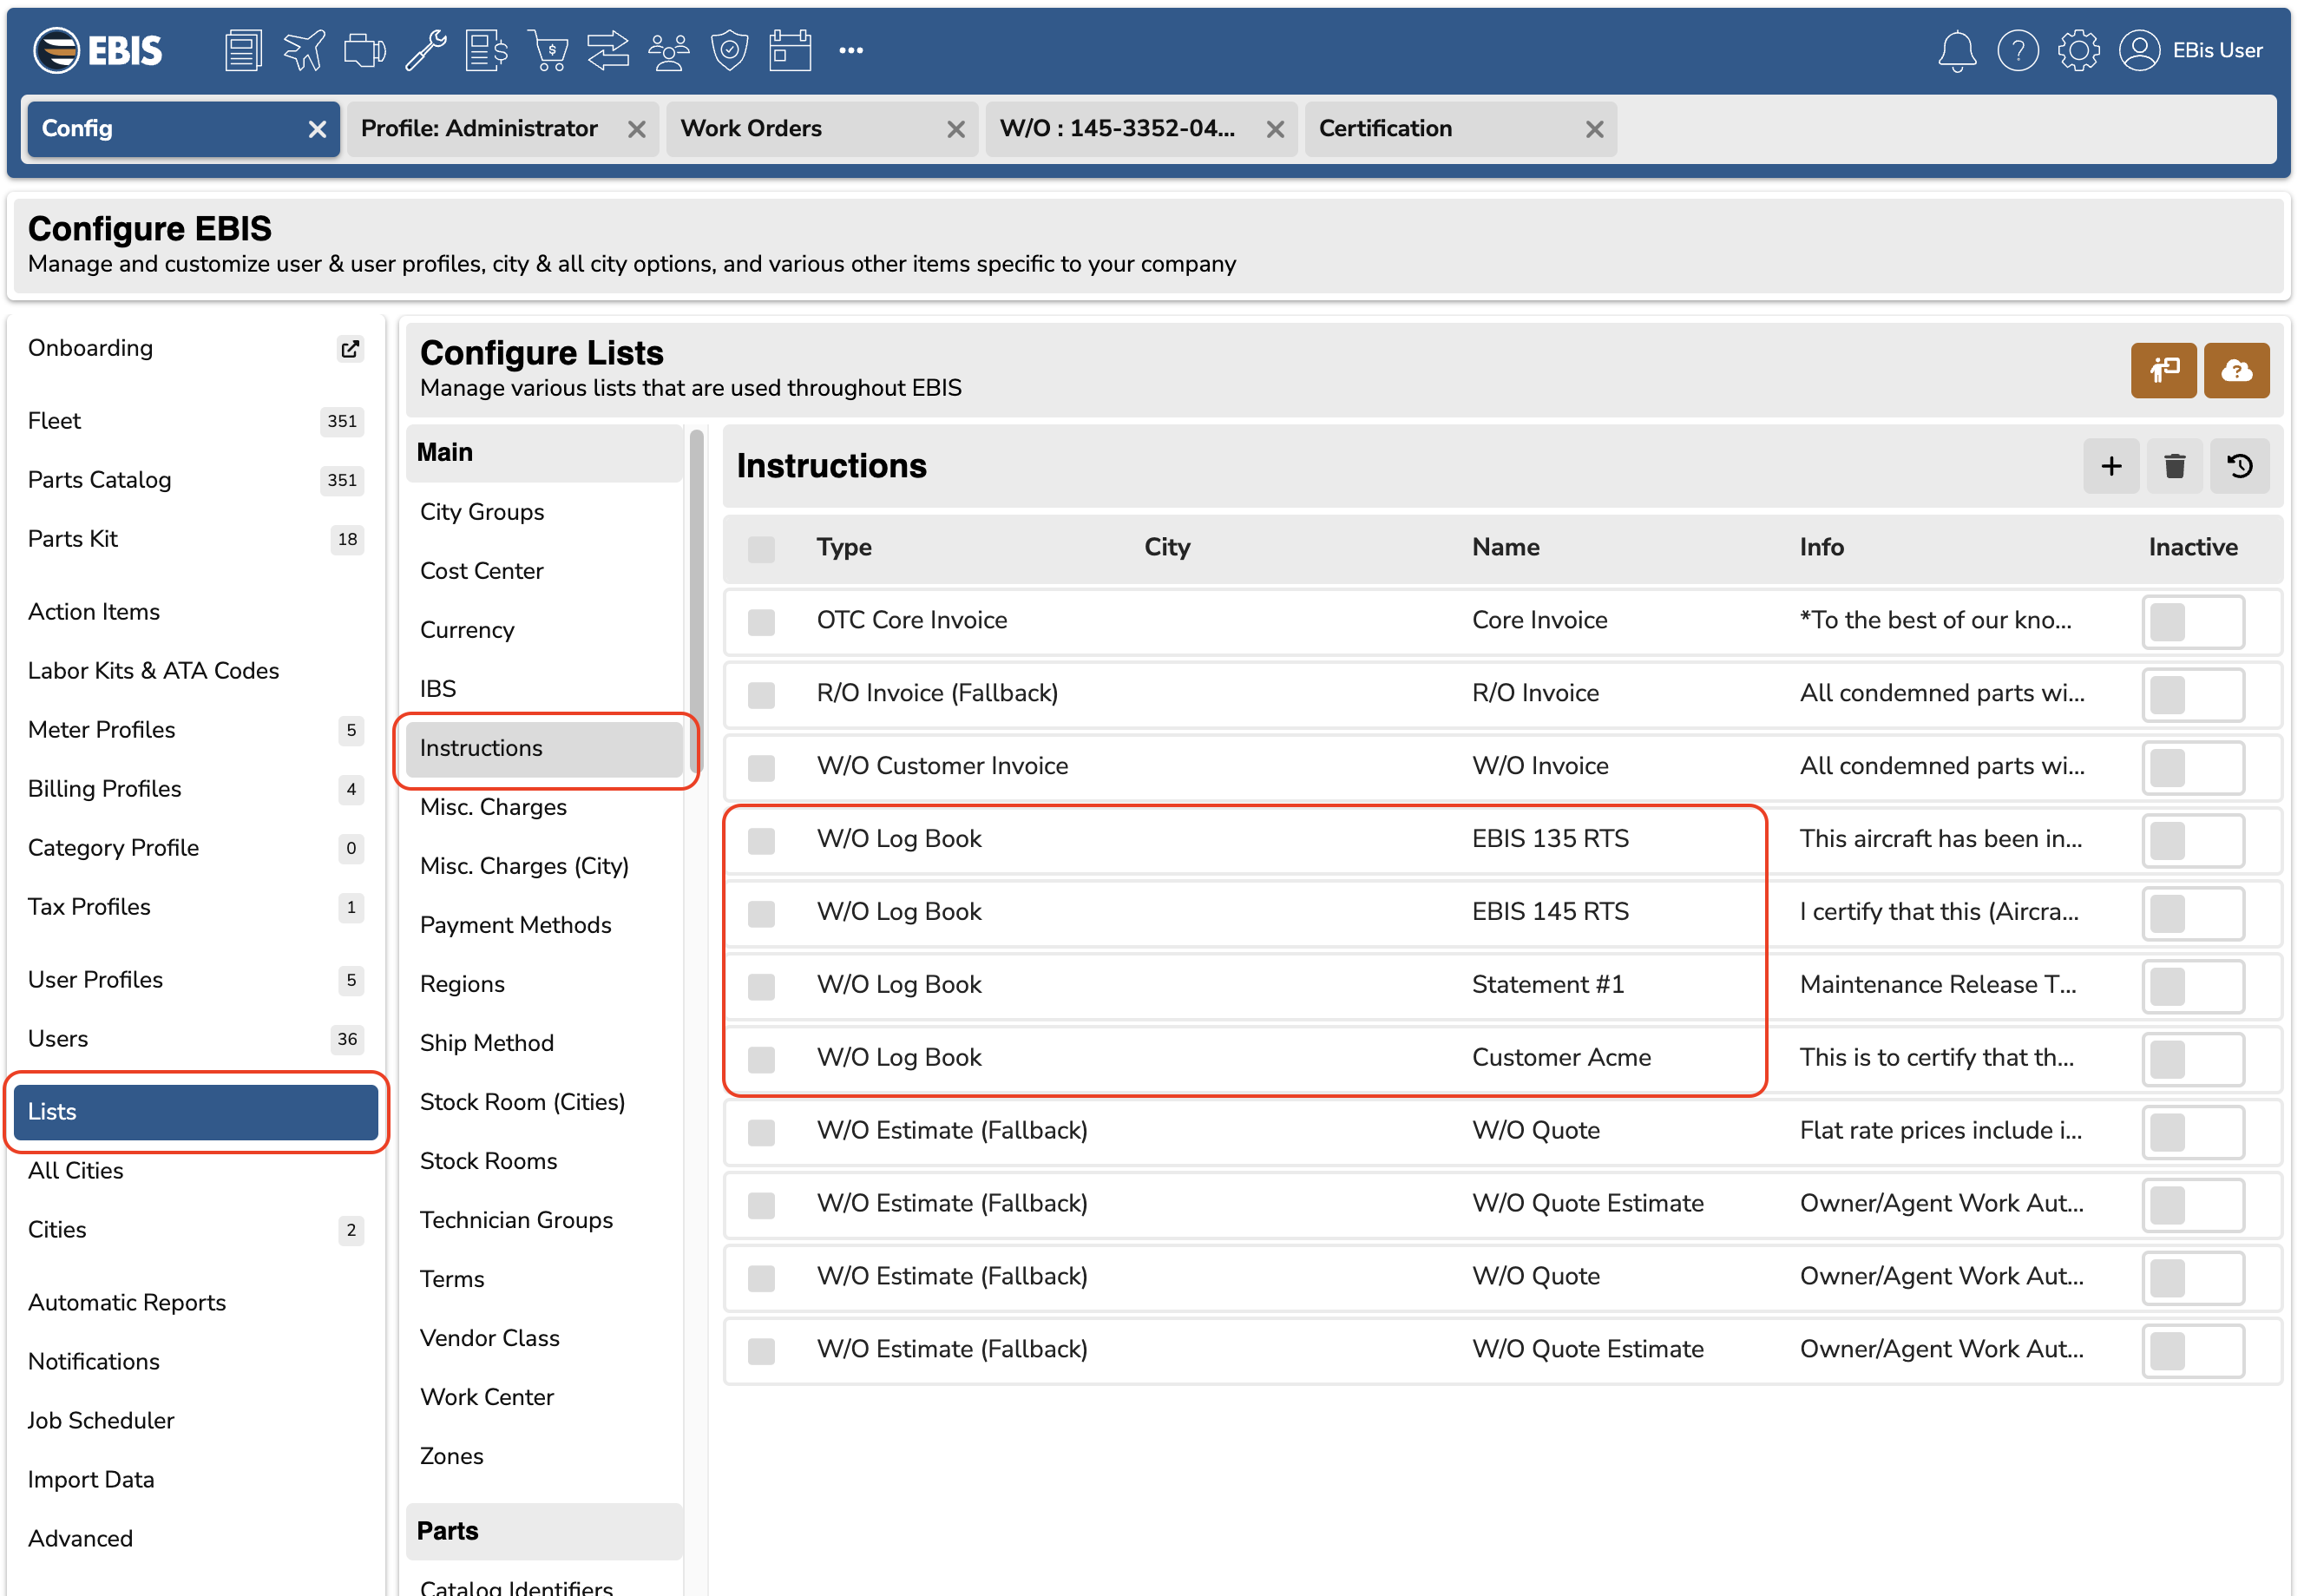
A log book statement is required on the W/O log book label: these are set from the Config > Lists > Instructions screen.
Display Profiles
Display profiles (more info here) allow you to customize the meter readings and/or aircraft detail that appear on the log book label: this is commonly displayed in the top right corner of the log book label.
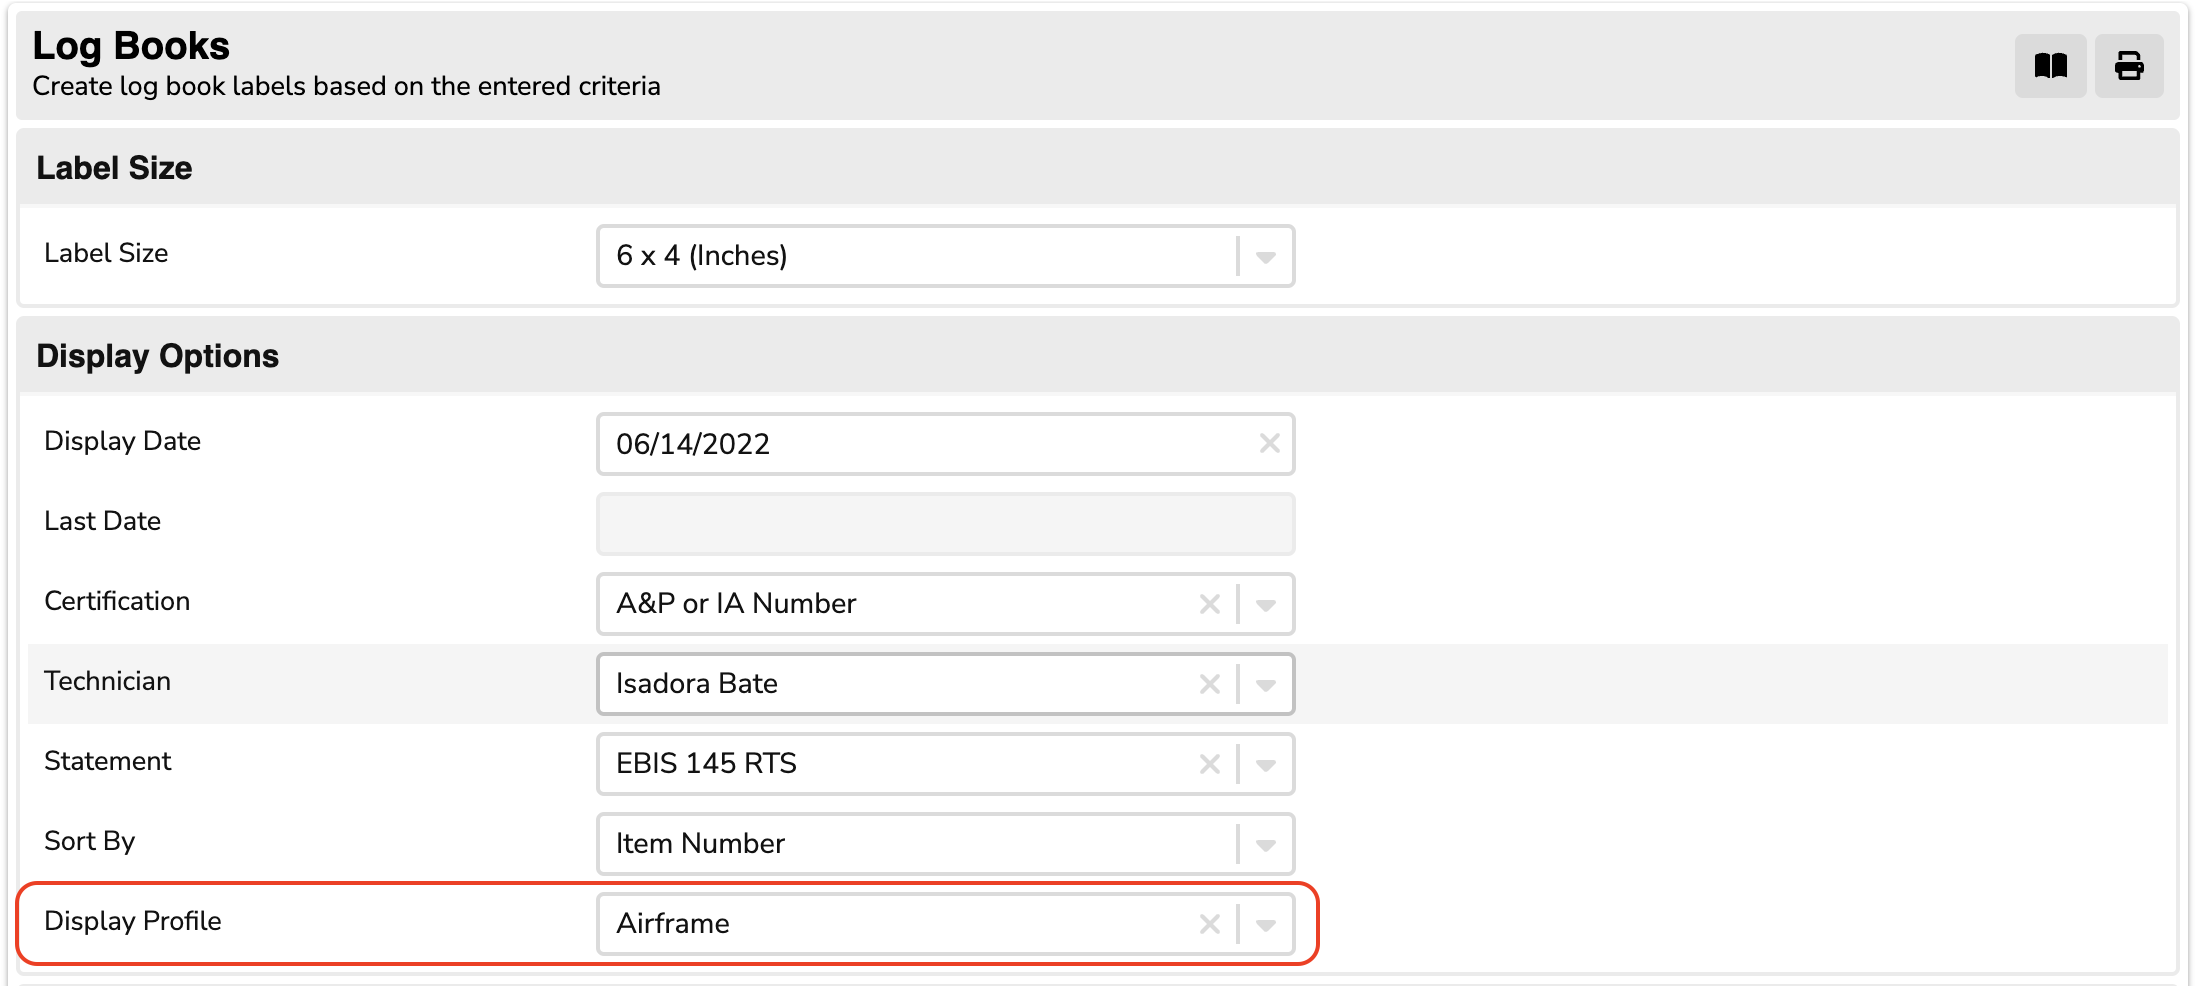
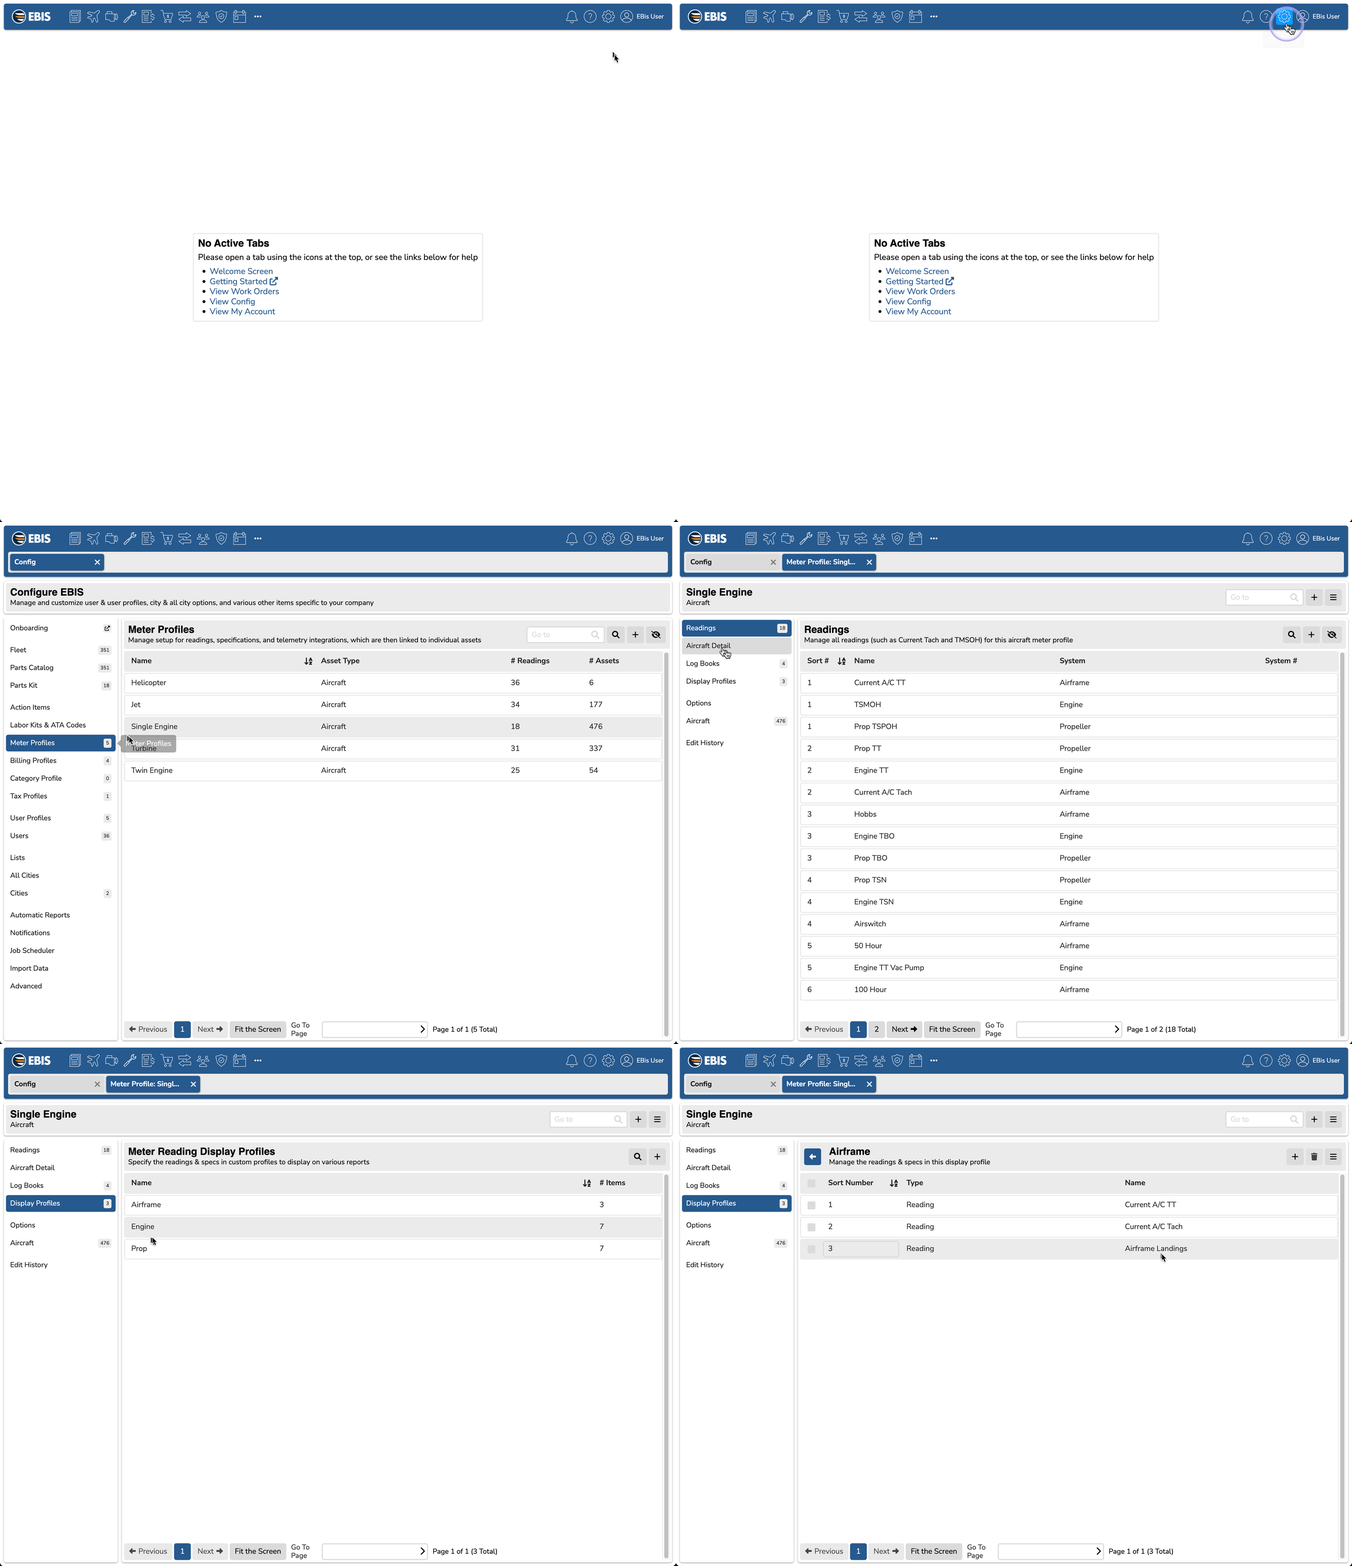
Display profiles are part of your meter profile: these are set in the Config menu > Meter Profiles.
You can create multiple display profiles: useful if you want to print multiple log book labels, such as an aircraft label with specific aircraft airframe info (such as TT, Landings, etc.), and another label with engine specific information such as Engine TSN, TBO, etc.
Selecting Items
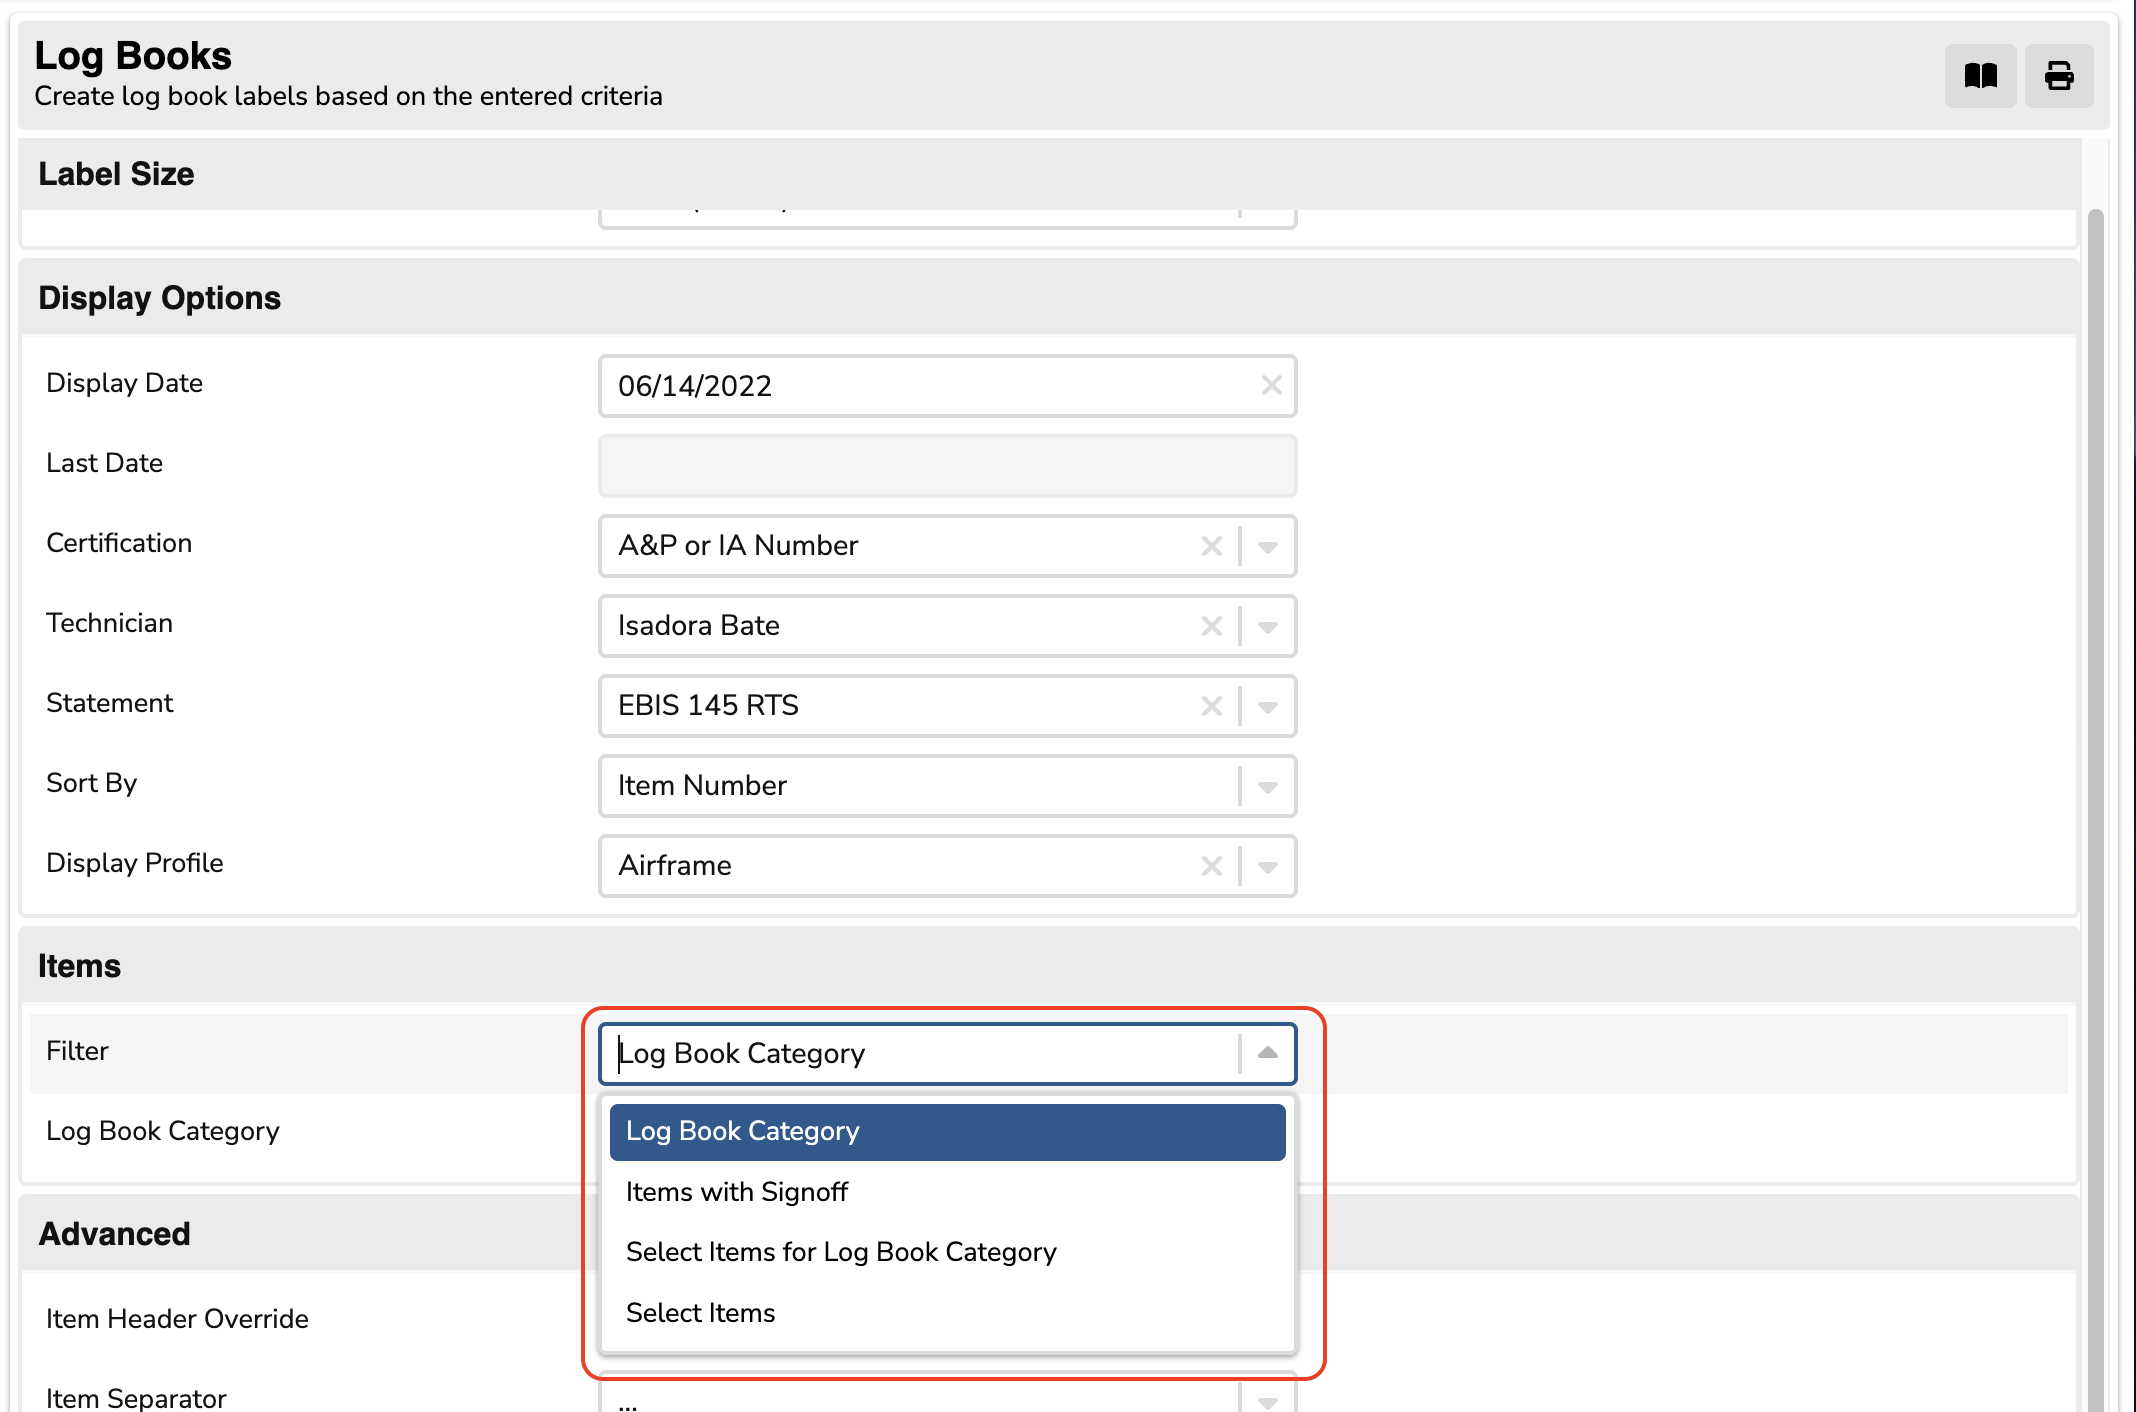
You can select the items to display on a log book label from the Items section of the W/O Log Books screen. While you can select specific items from the full list in a work order, or items with a specific signoff, the most common option is using the Log Book Category.
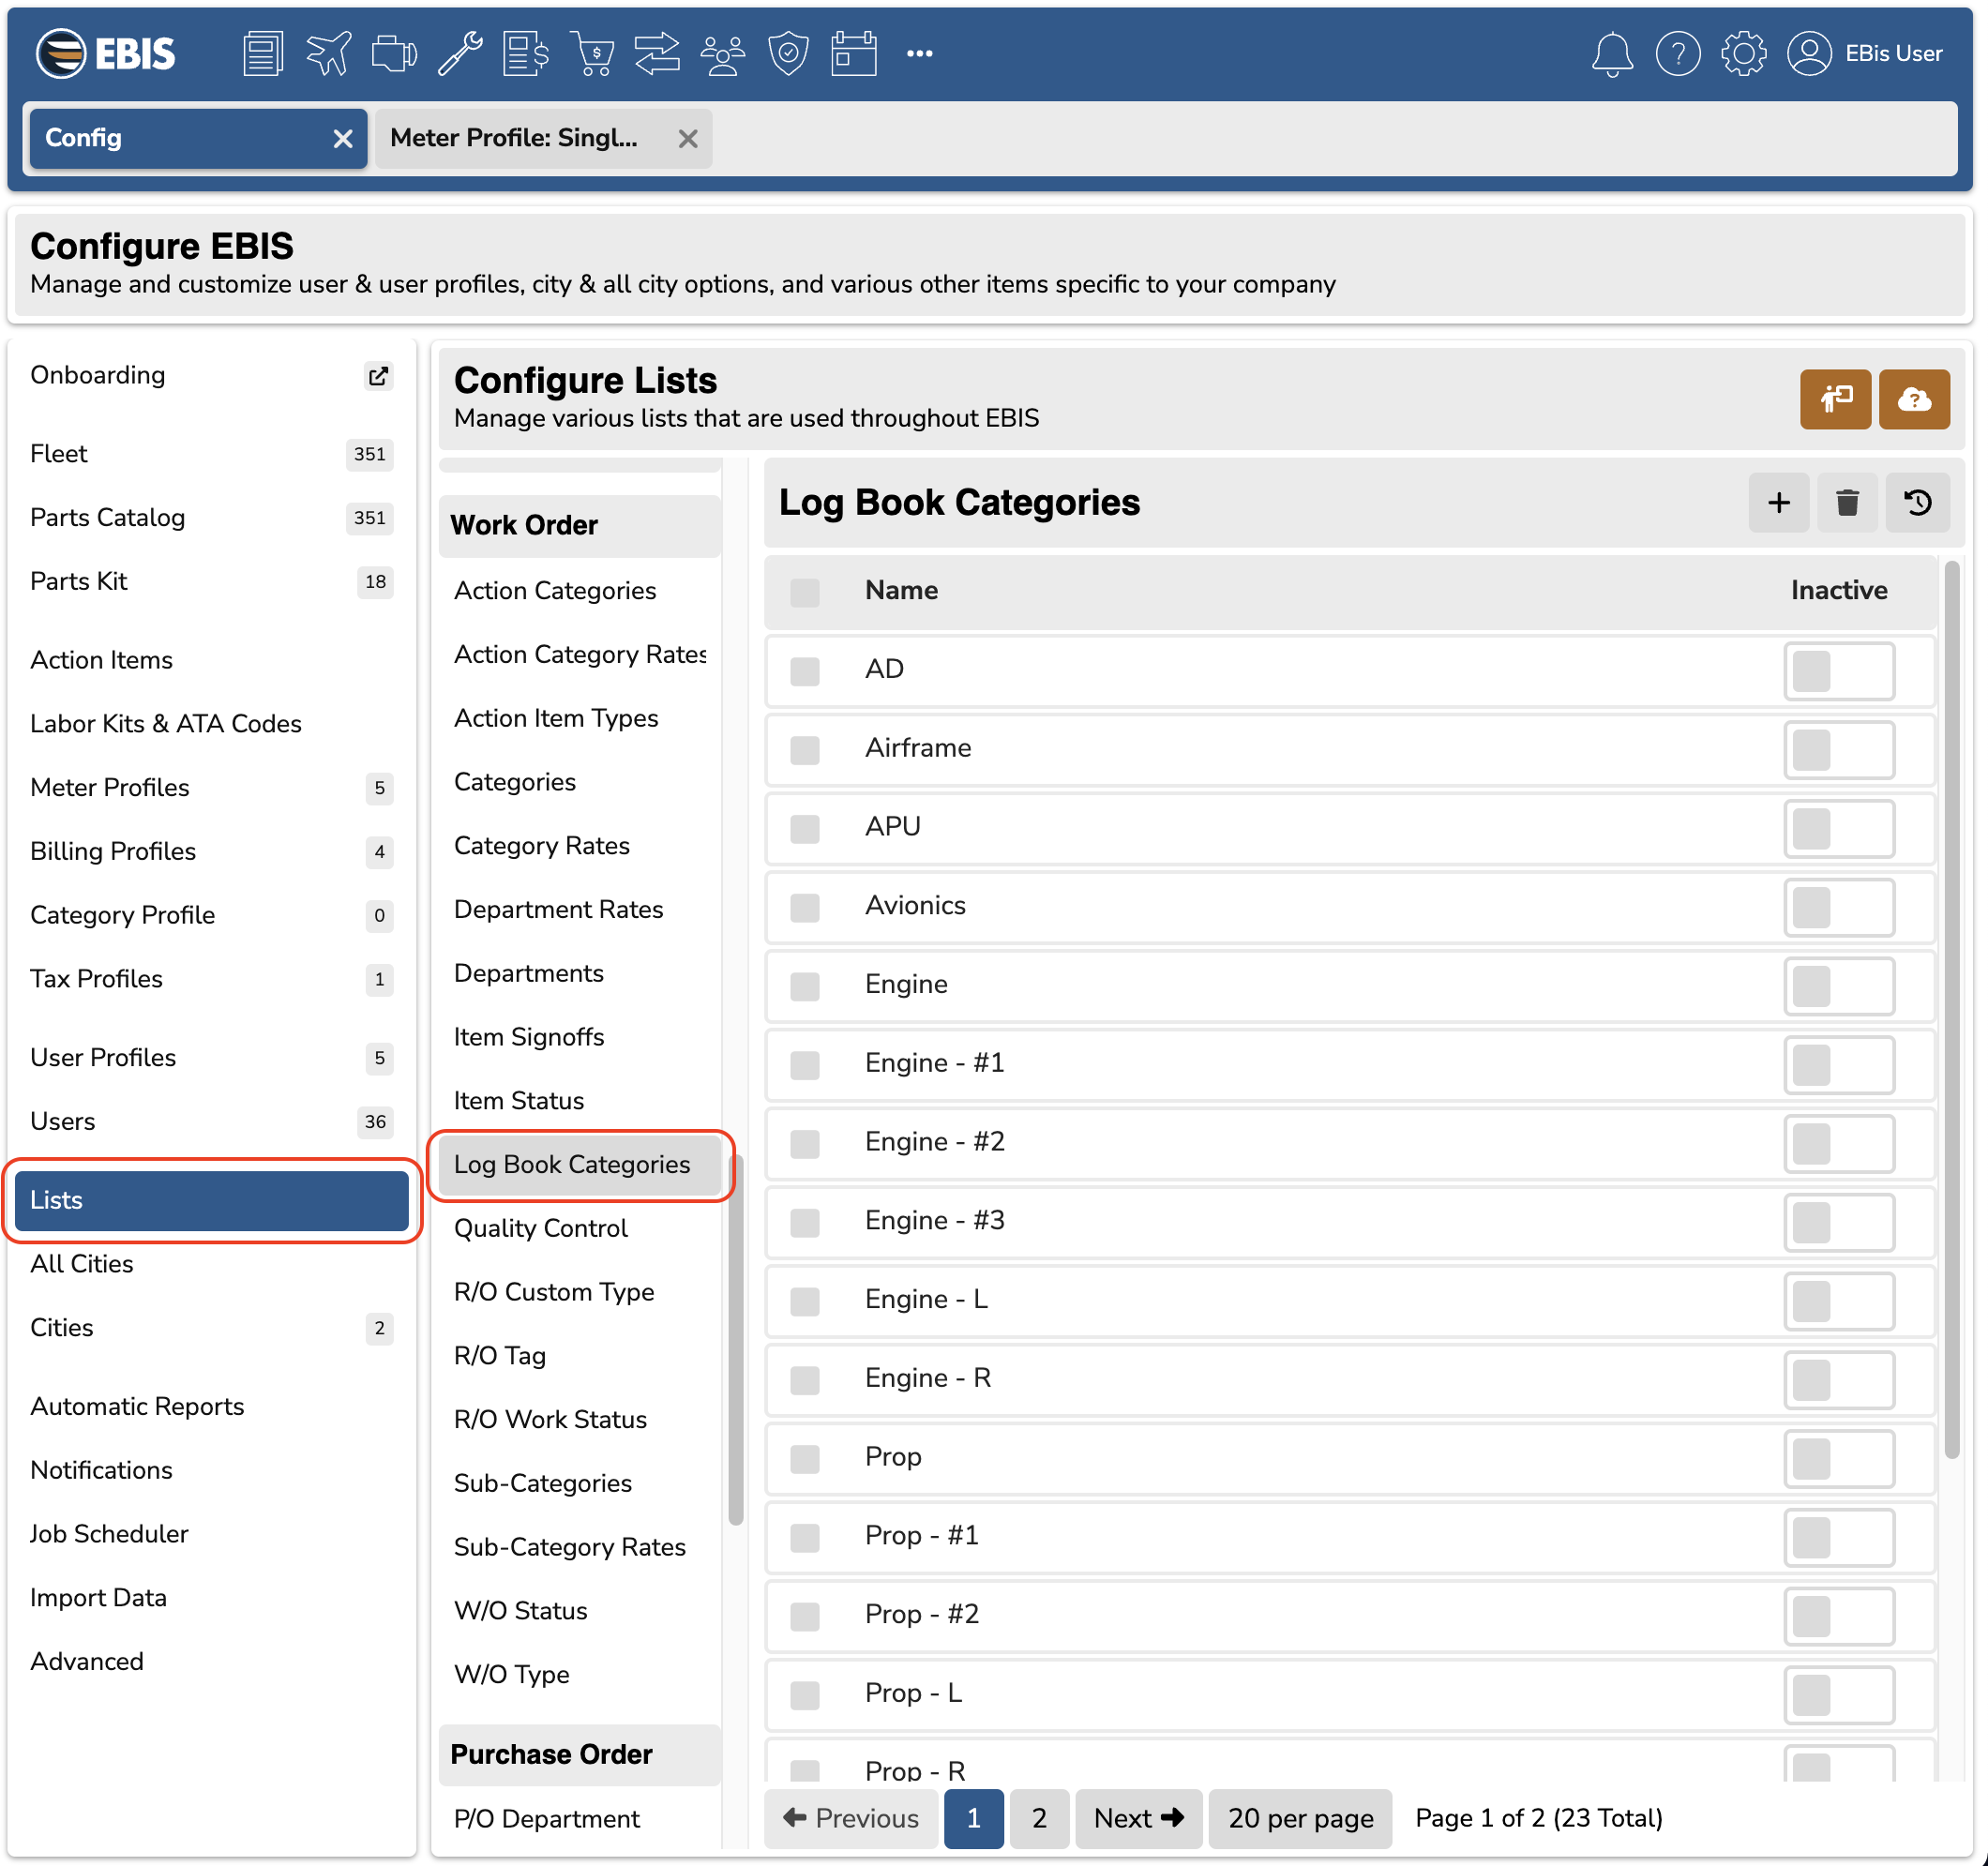
The full list of log book categories are set from Config > Lists > Log Book Categories:
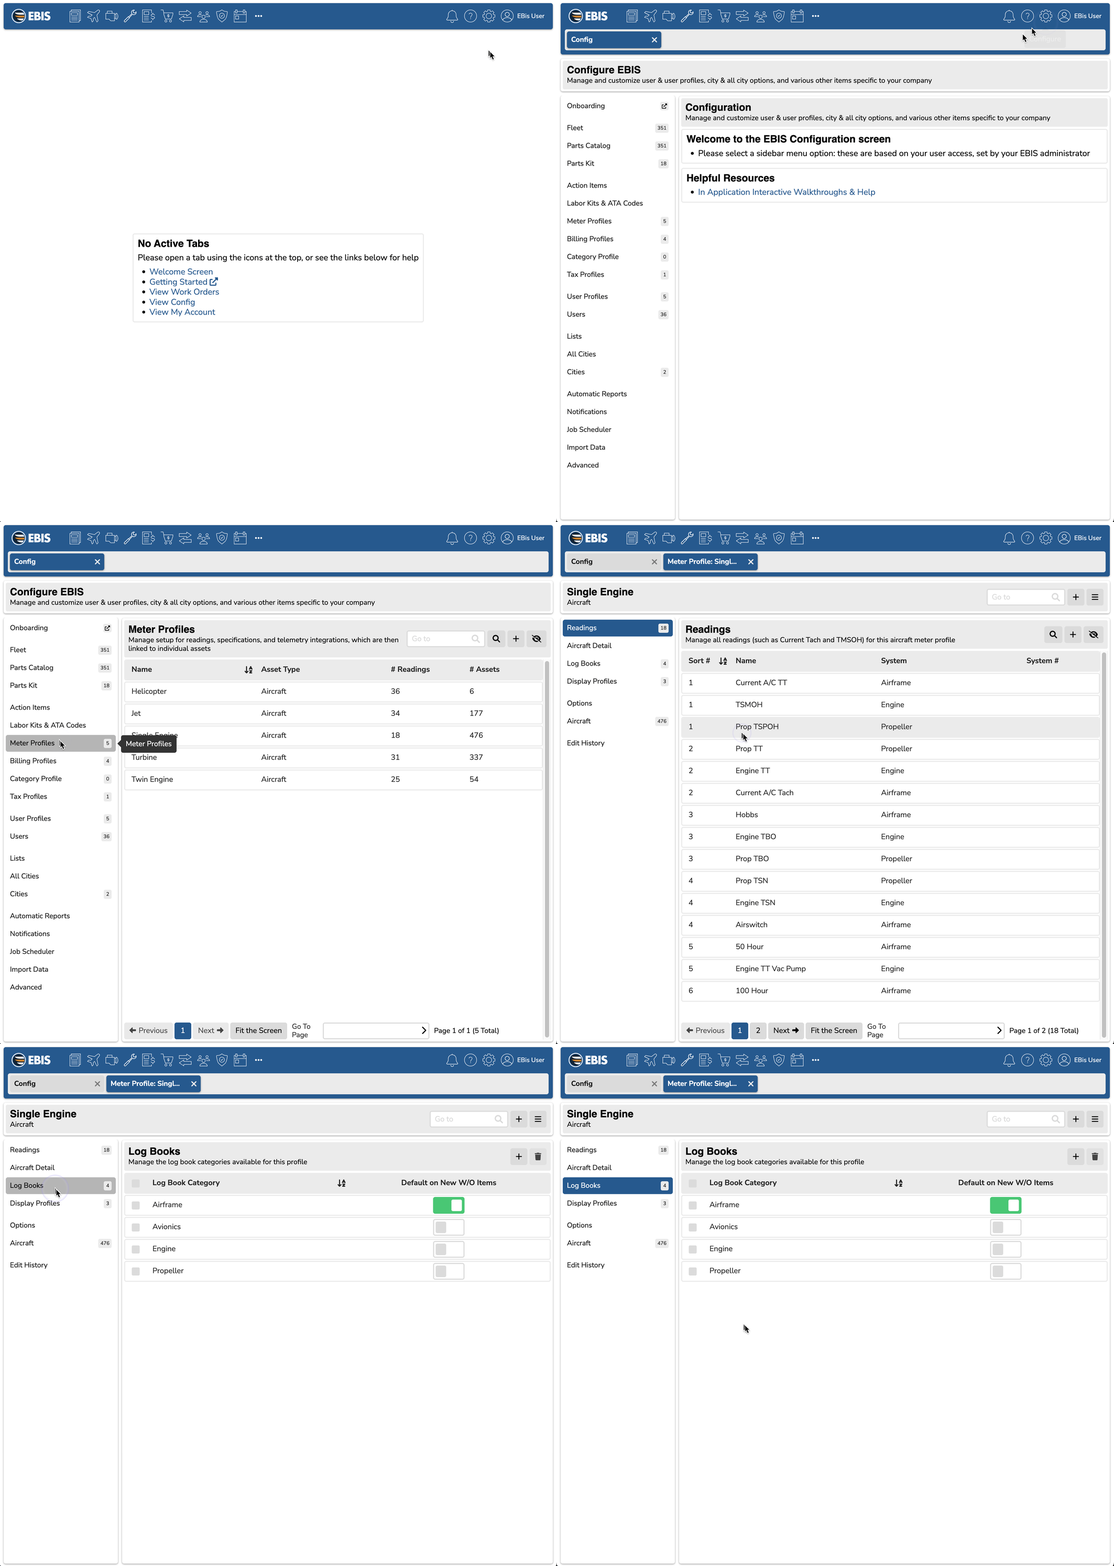
Once the main list is setup, you can specify the log book categories that apply to each meter profile from the Config > Meter Profile screen.
Now that the log book configuration list is set for the meter profile, in a work order for an aircraft that uses that meter profile, you can add one or more categories to the specific item.
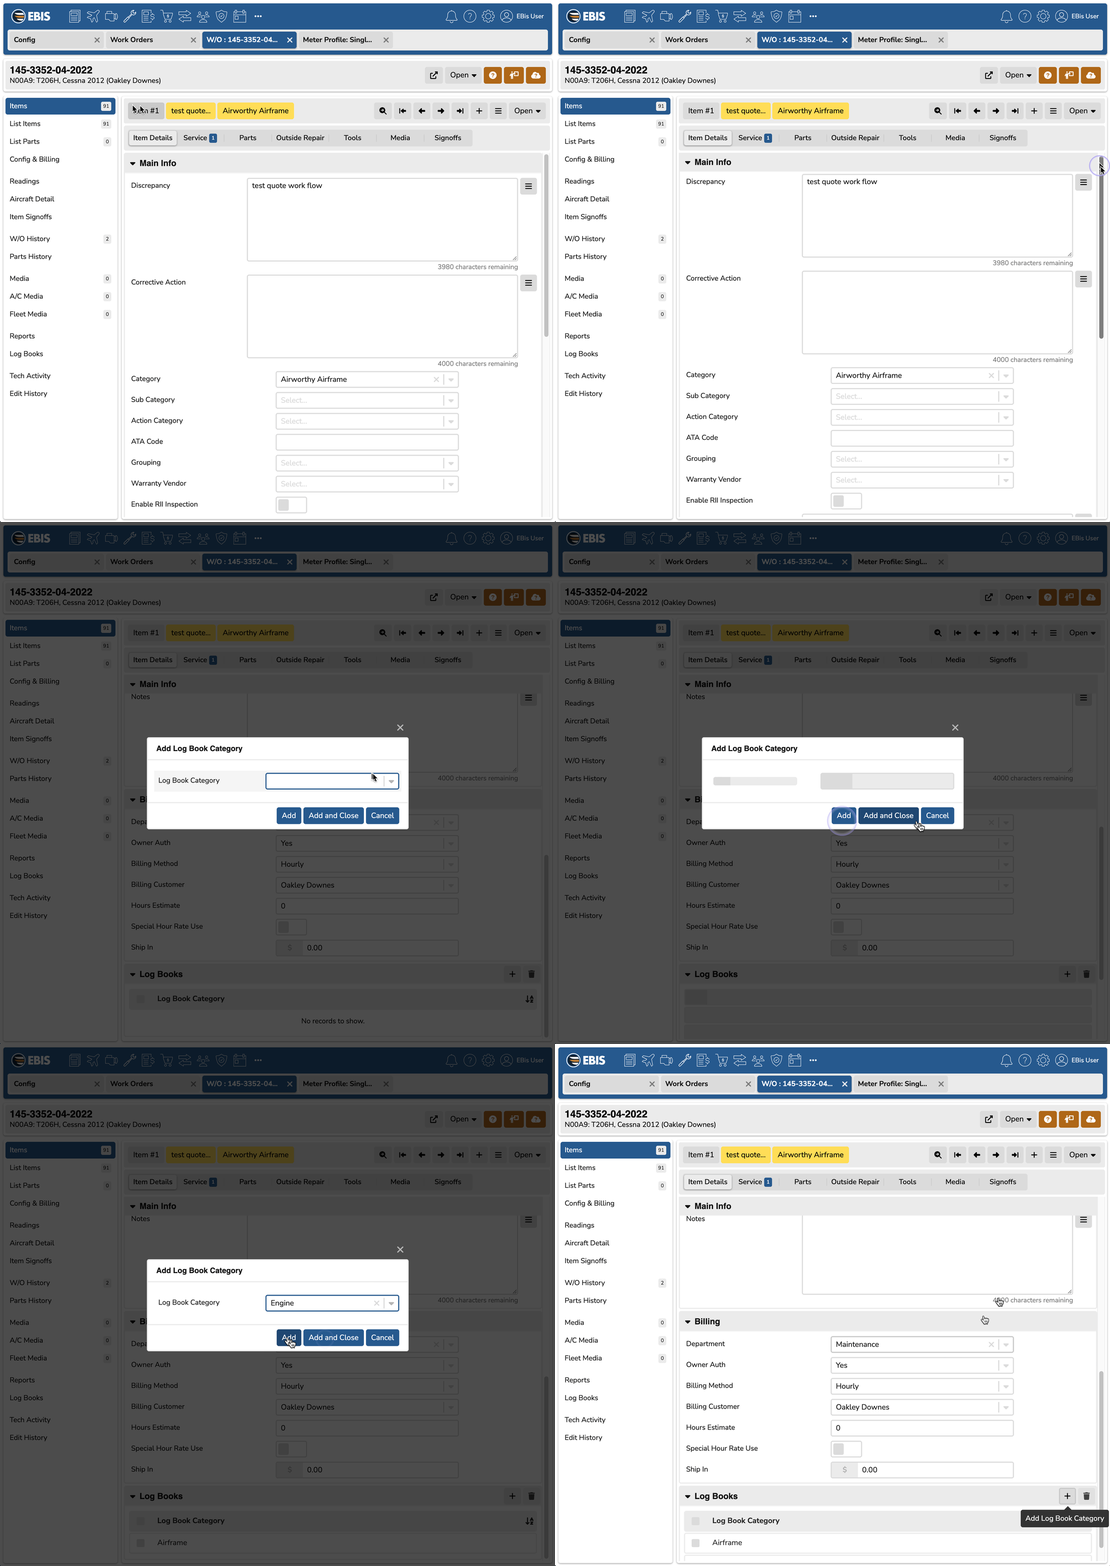
If you do not want to display the item on a log book, we recommend you do not add any log book categories for the item.
If you have a common category(s) that you normally want to use by default on new items that are created, such as "Airframe", you can set this as a default within the specific meter profile (Config > Meter Profiles > Log Books sidebar).
Advanced Options
The Item Header Override will change the bold title that is above the list of items on the generated PDF label.
The Item Separator will allow you to customize if you want the items showing one after another, use the "..." to keep items on the same line such as: Item 1 Description... Item 2 Description... Item 3 Detail... Item 4. "New Line" will add each item on their own line.
Item Display allows you to customize if you want the item number to show on the label.
Item Text Display is used to determine if you want to display only the corrective action, or also include the discrepancy.
Font Sizes
If you would the font sizes increased from the defaults, please contact support.
See Also
